A workspace (also called a tenant) is your organisation’s TRAX environment. This page covers how to view your workspaces, invite team members in, and control what those team members can do via roles.
Your workspaces
Click Workspaces in the left navigation of TRAX to see every workspace your account belongs to.
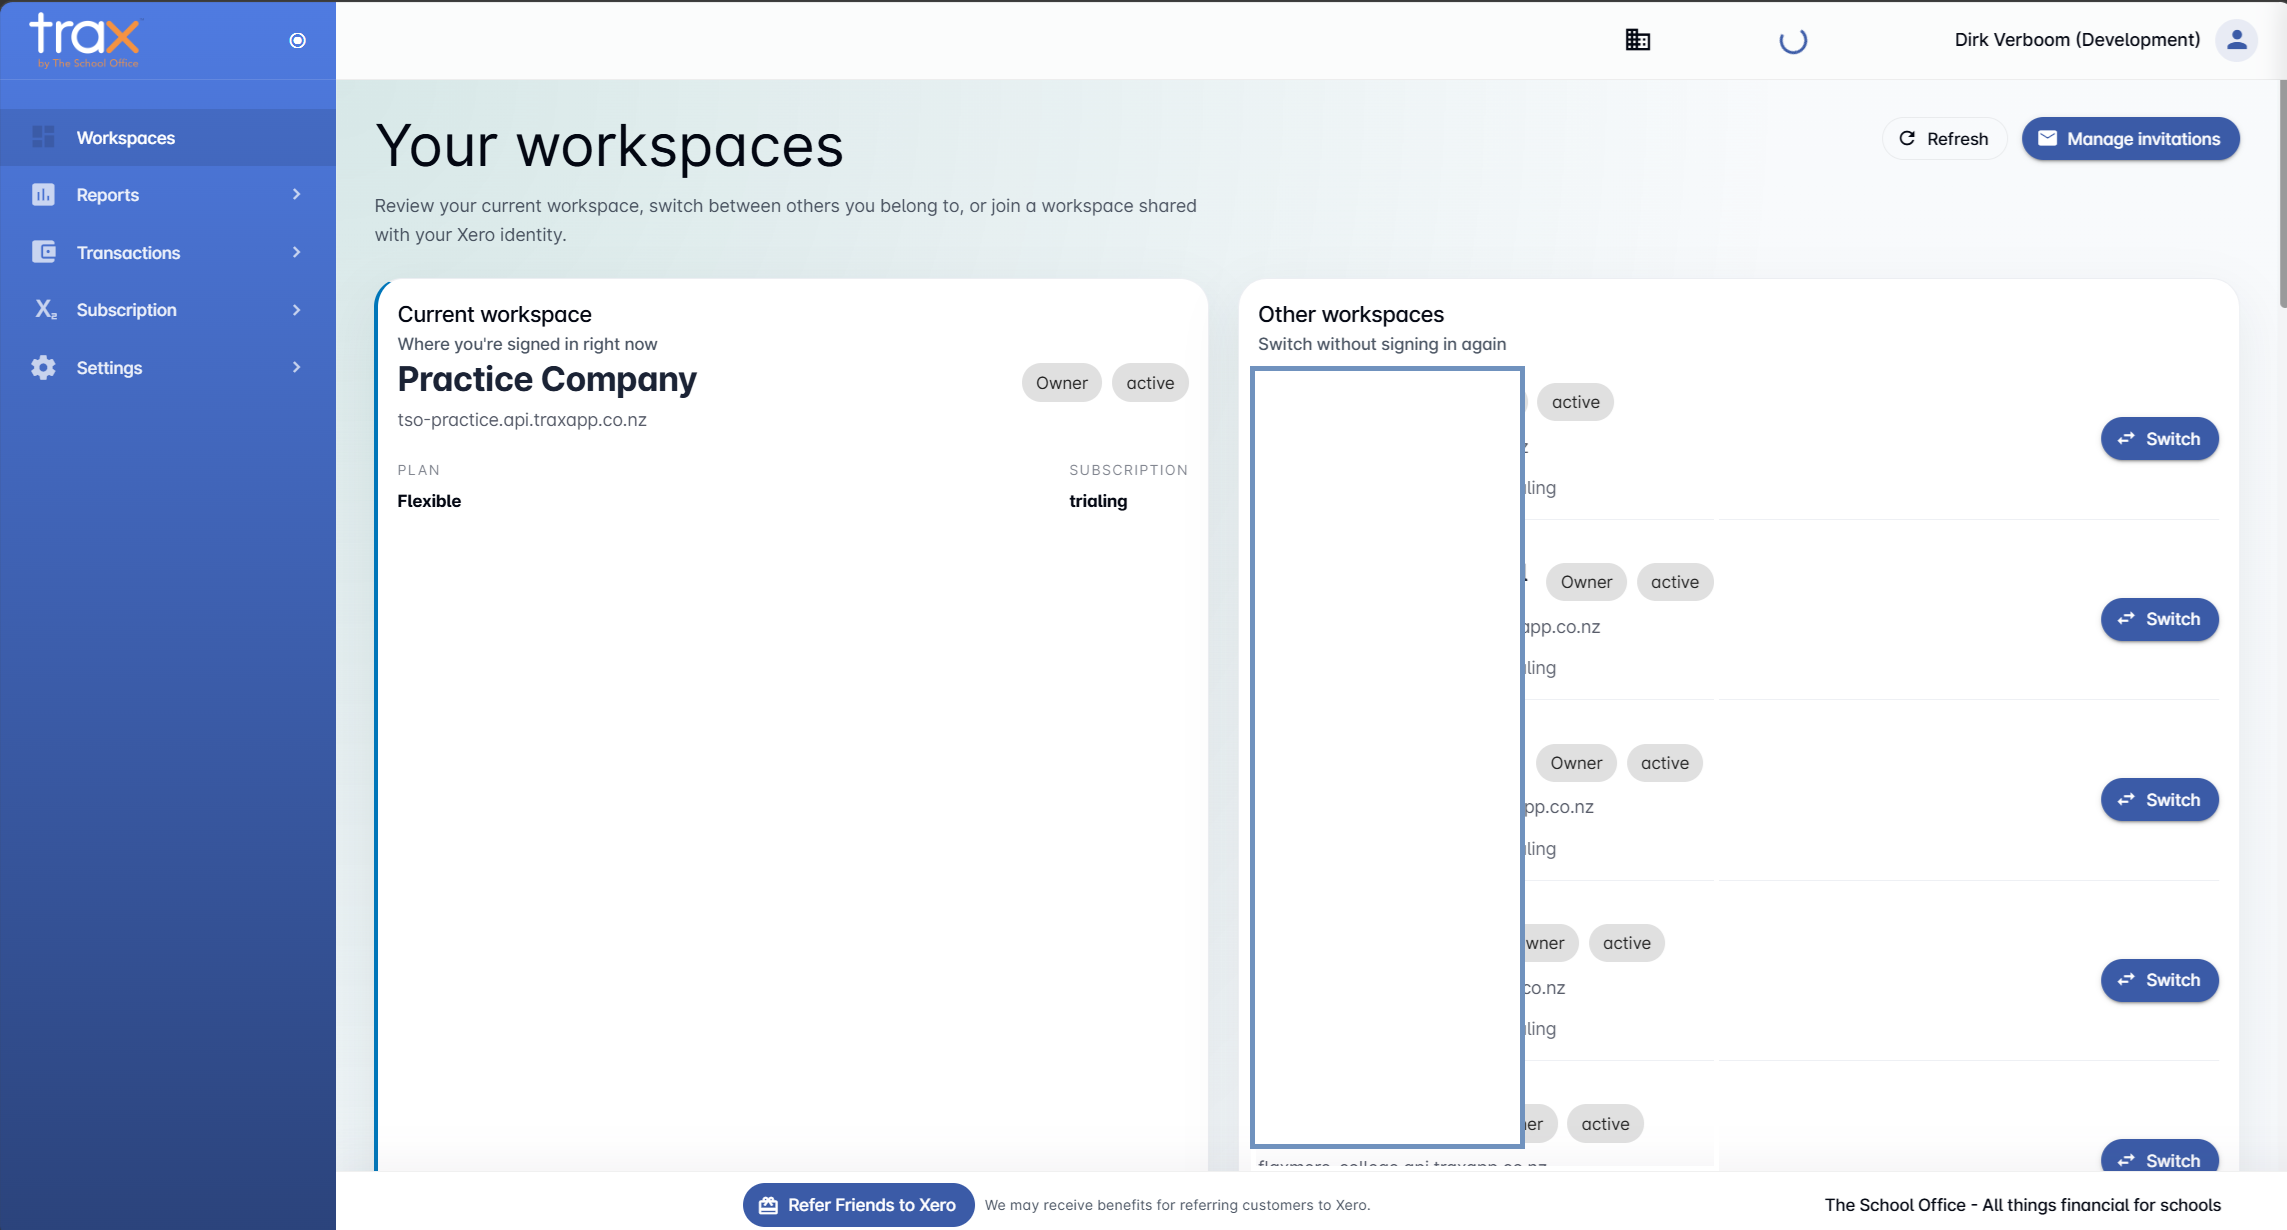
The page is split into two panels:
- Current workspace. Shows the workspace you’re signed into right now — its name, subdomain, plan, subscription status, and your role within it. In the example above, the current workspace is Practice Company on the Flexible plan, with the user signed in as Owner.
- Other workspaces. Lists every other workspace your account belongs to. Each row has a Switch button that takes you straight into that workspace without needing to log in again. Status badges (Owner, Active, Trialing, etc.) show your role and the workspace’s subscription state at a glance.
Two useful buttons sit in the top-right of the page:
- Refresh — re-syncs the list against your Xero identity in case you’ve recently been added to or removed from a workspace.
- Manage Invitations — jumps to the Invitations panel (covered below) so you can invite users into the current workspace.
You can also join a new workspace this way: if a colleague invites you using the same Xero identity you signed up with, the workspace will automatically appear in Other workspaces once you click Refresh.
Inviting users to your workspace
To bring someone new into your workspace, navigate to Settings → Invitations in the left sidebar.
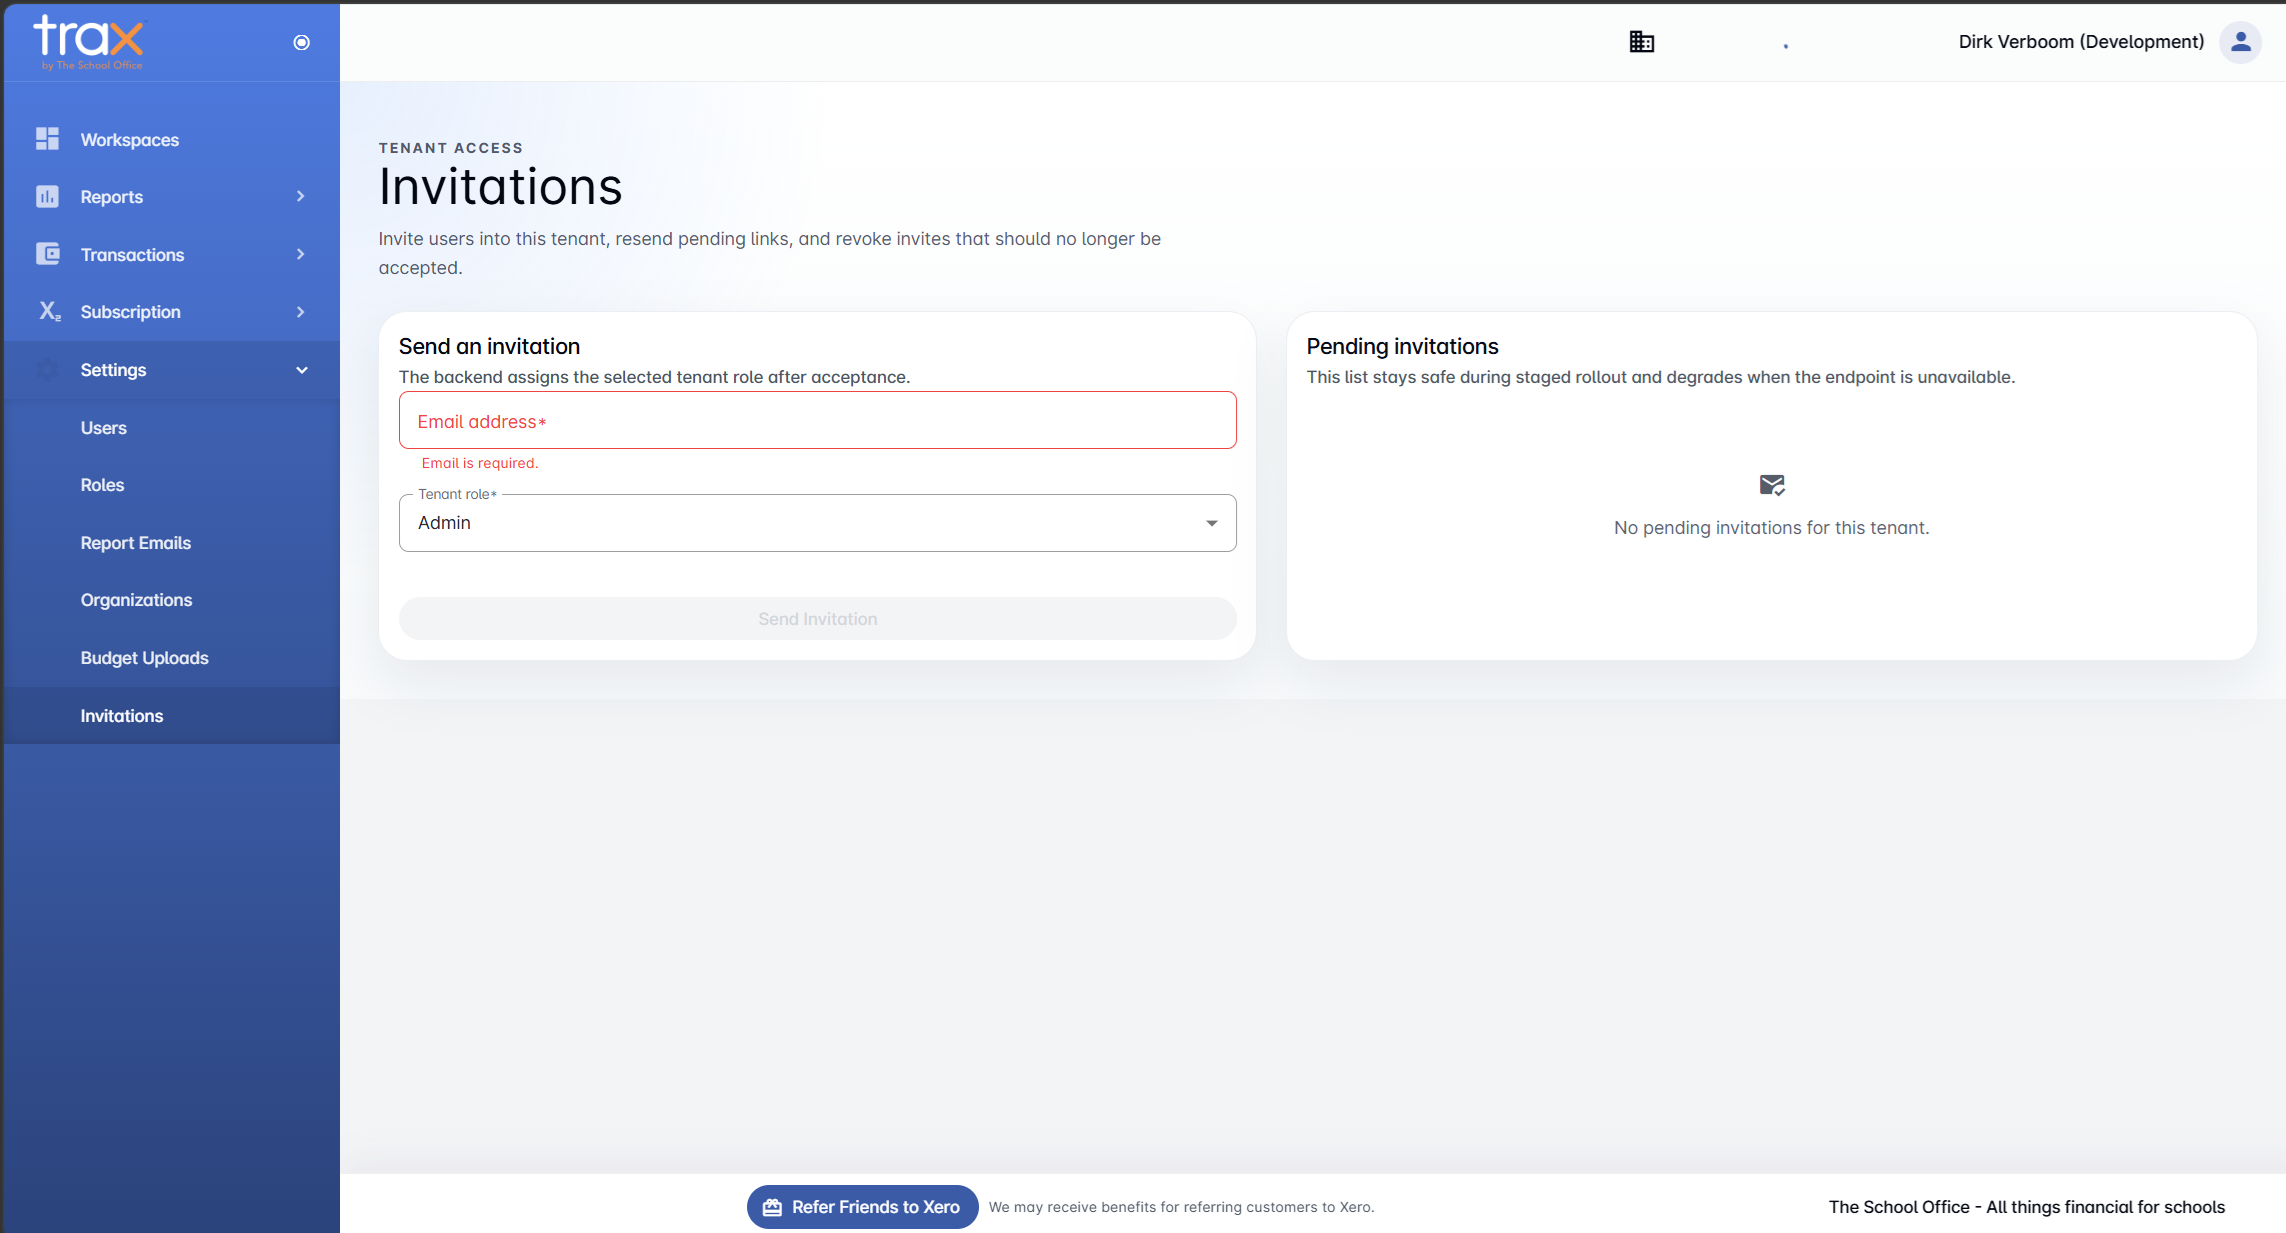
The Invitations page has two panels:
- Send an invitation. Enter the new user’s email address and pick the role they’ll have when they accept.
- Pending invitations. Lists every invite that’s been sent but not yet accepted. From here you can resend the invite link or revoke it.
Choosing a role
The Tenant role dropdown defaults to Admin. Click it to choose a different role.
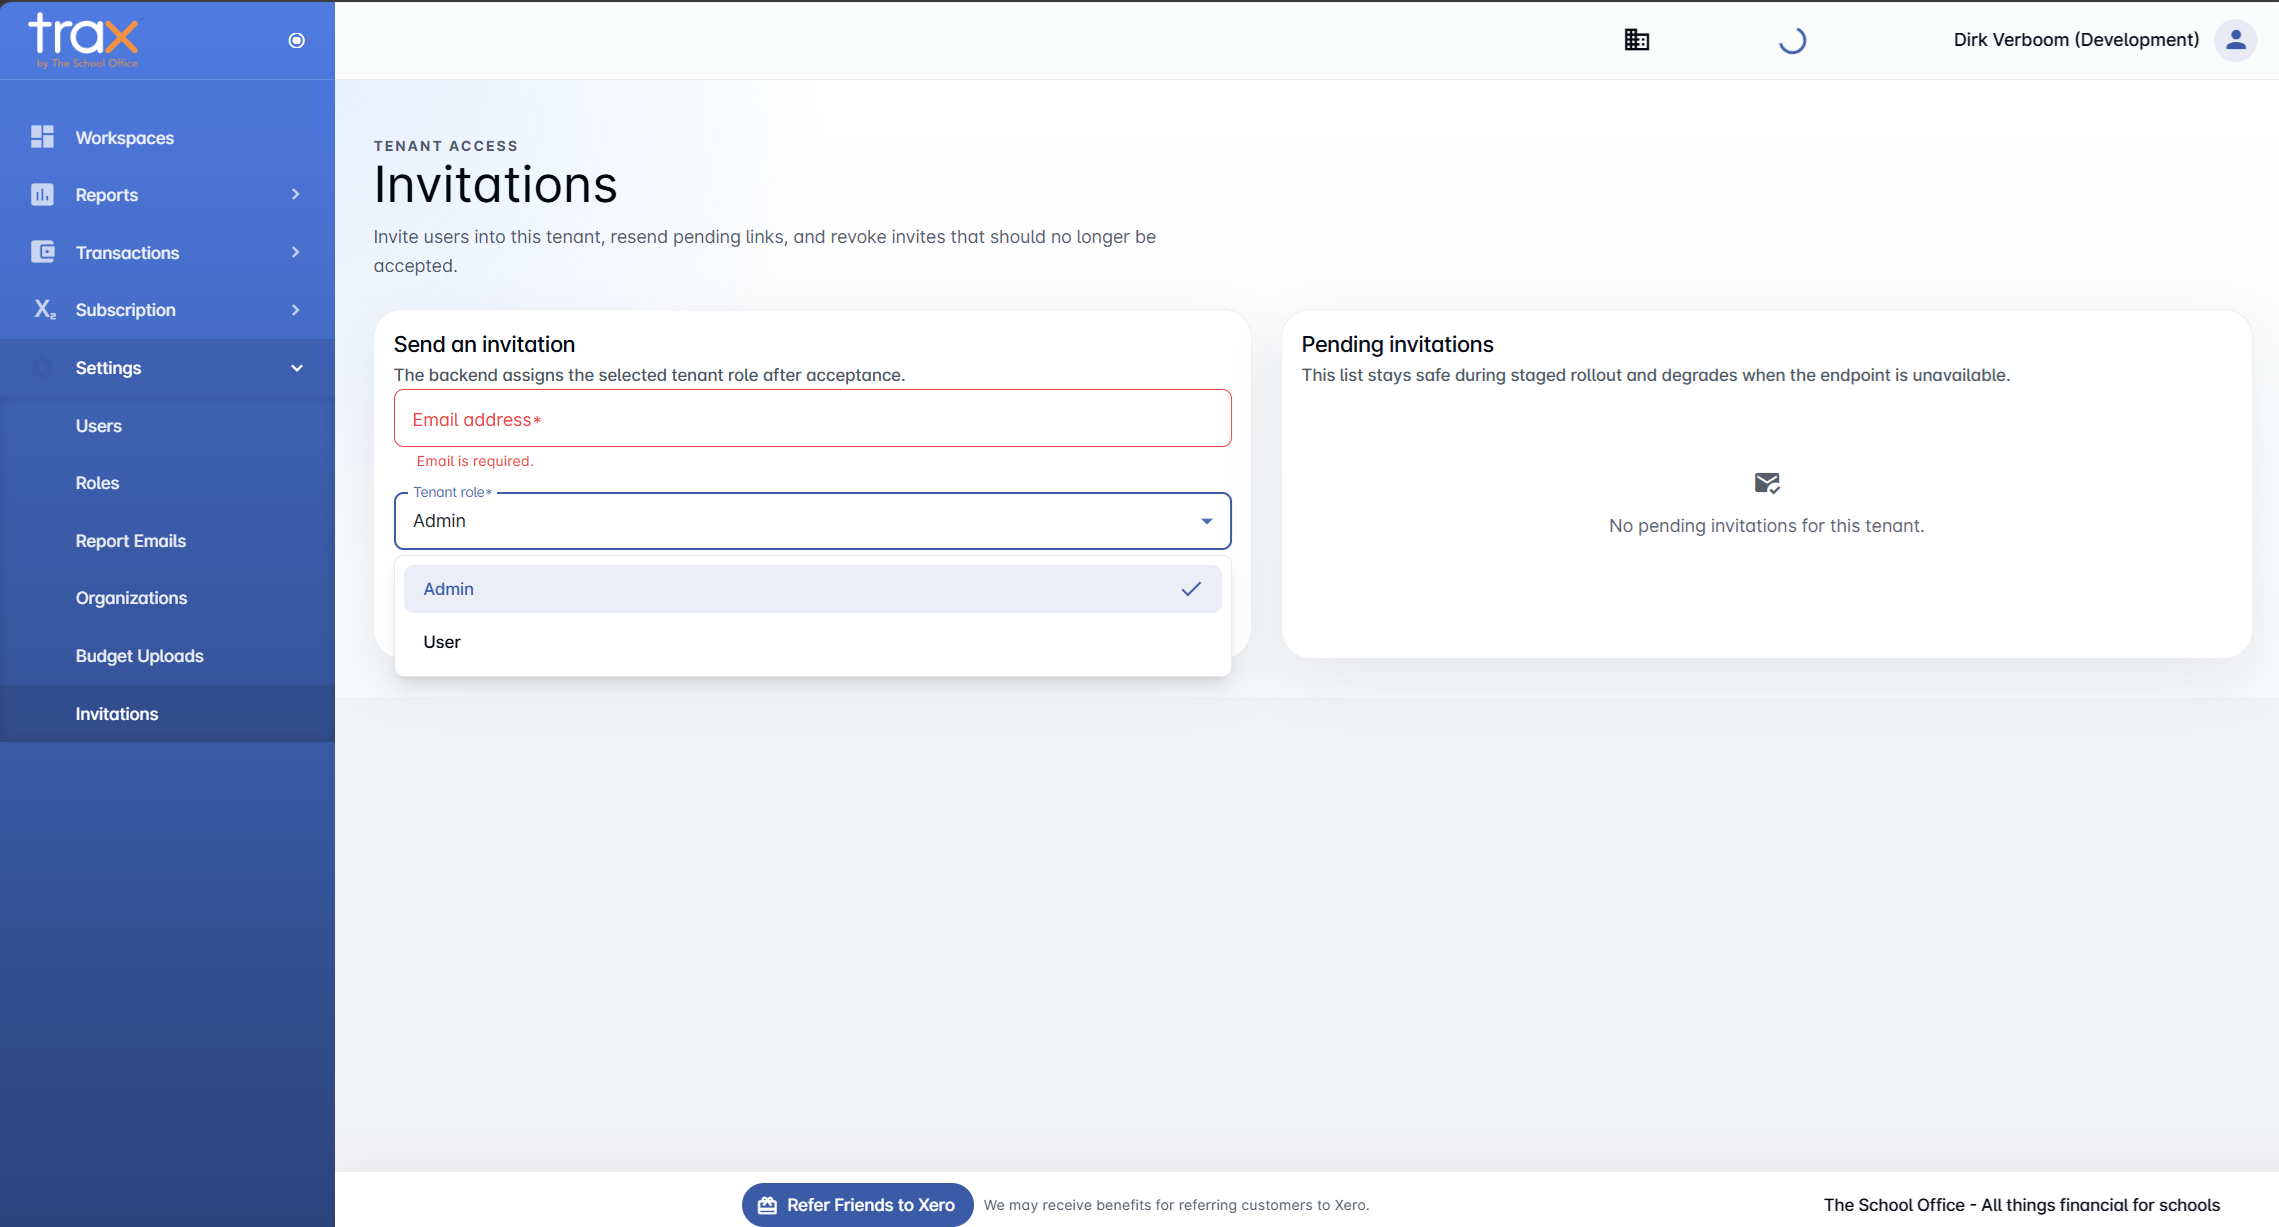
By default you’ll see two built-in roles:
- Admin — full access to the workspace, including settings, users, and subscription management.
- User — limited access, defined by the permissions configured for the User role.
If you’ve created custom roles via Settings → Roles (covered next), they’ll also appear here.
Sending the invitation
Once you’ve entered an email and selected a role, the Send Invitation button activates.
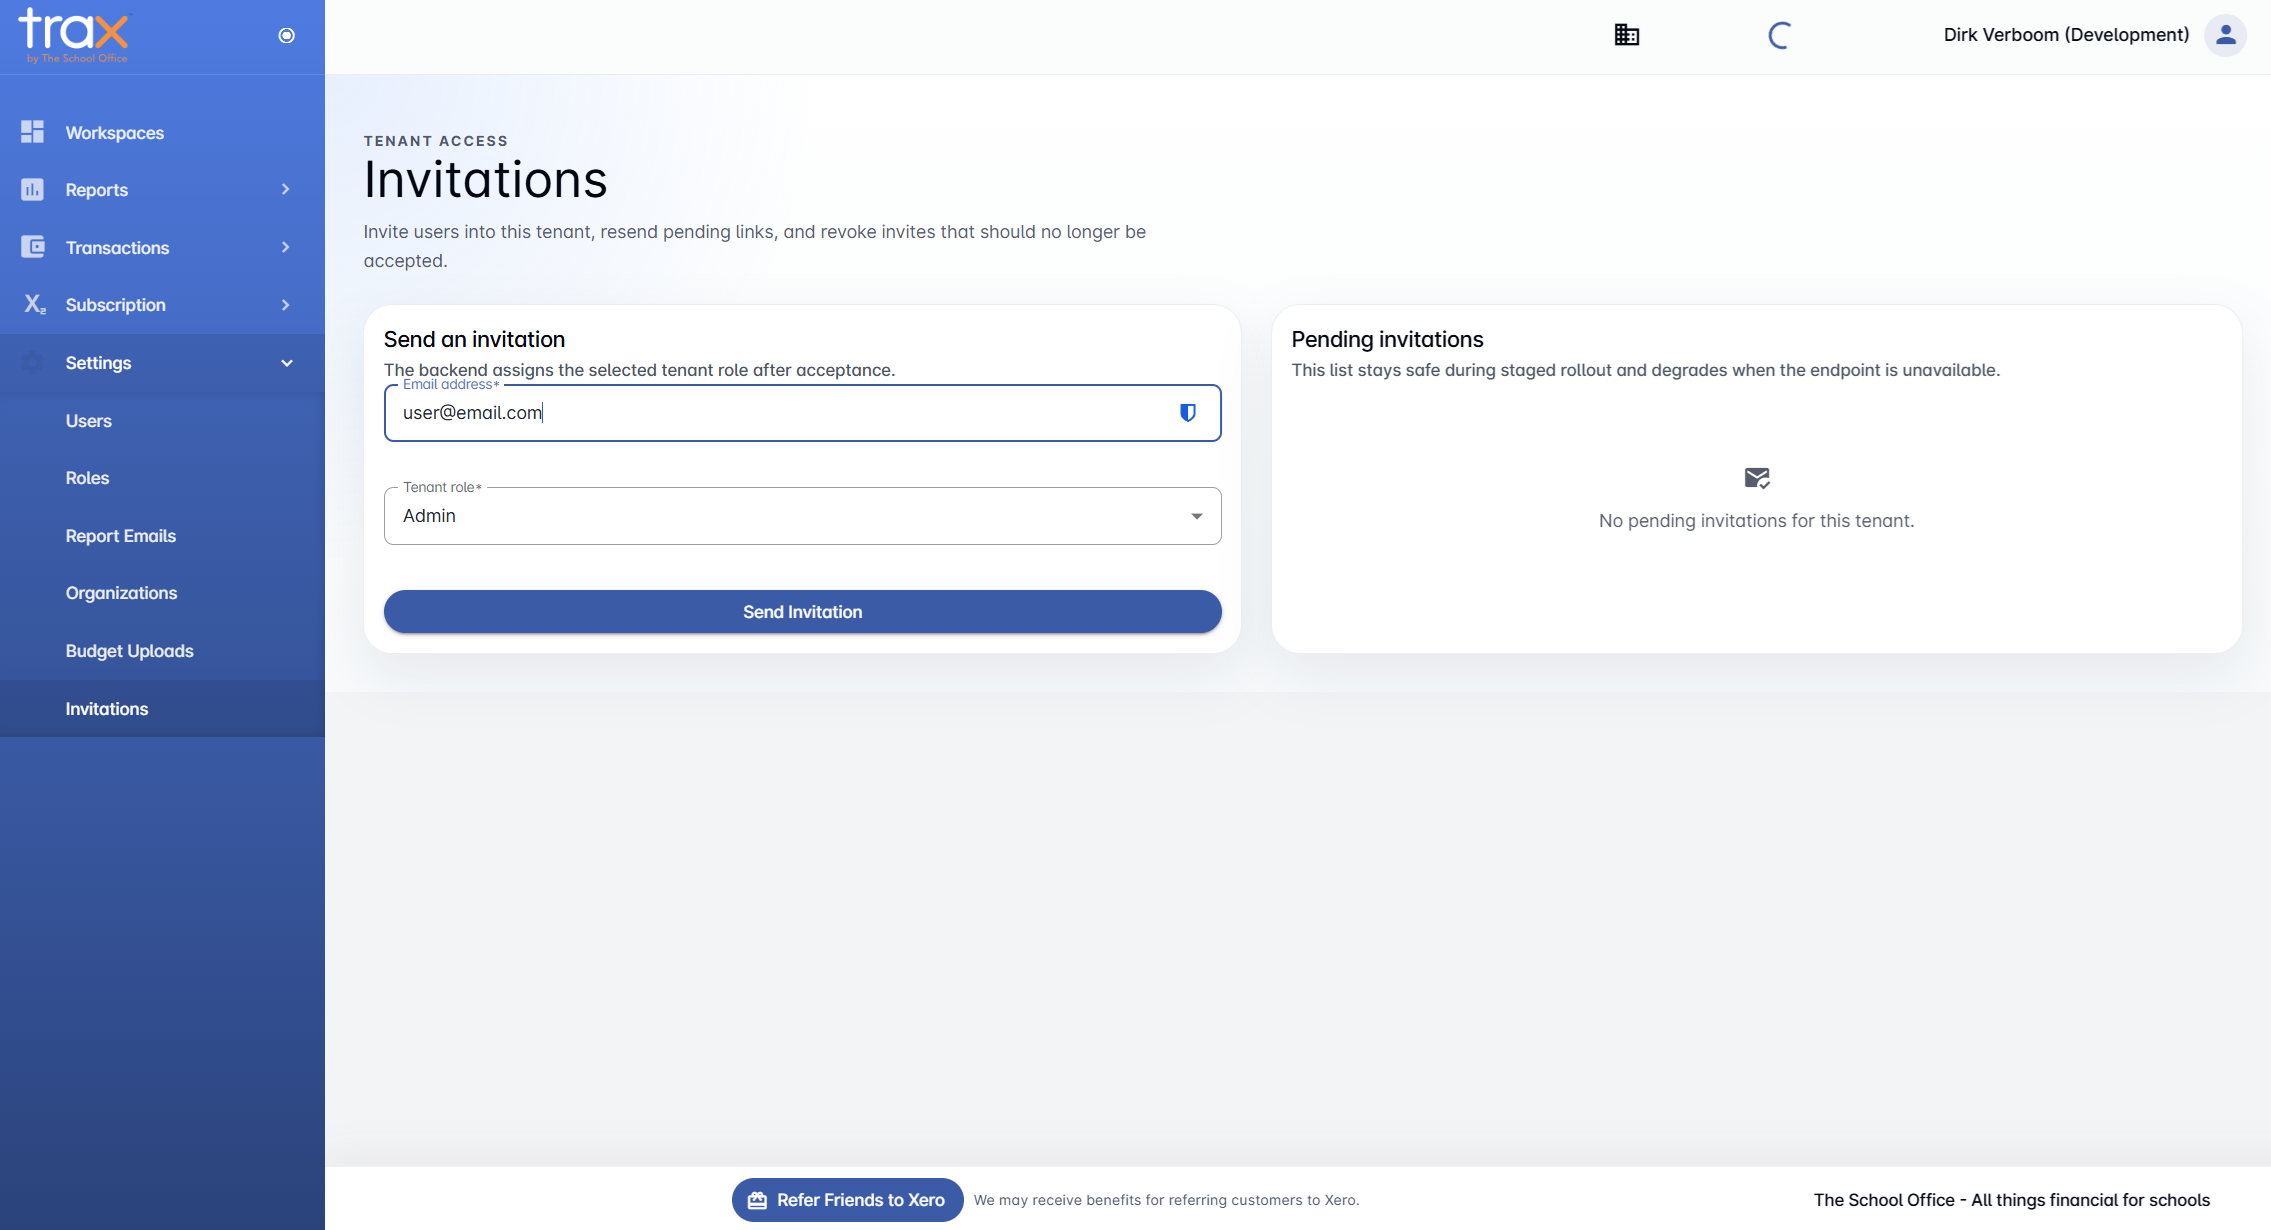
Click it to send the invite. The recipient will receive an email with a link that adds them to your workspace when they sign up or log in.
Note: Pending invitations remain valid for repeated attempts during staged rollouts. The list “stays safe” if the endpoint is briefly unavailable, so you don’t need to worry about lost invites.
Defining roles for your workspace
For finer-grained control over what users can do, create custom roles. Navigate to Settings → Roles and click + New Role.
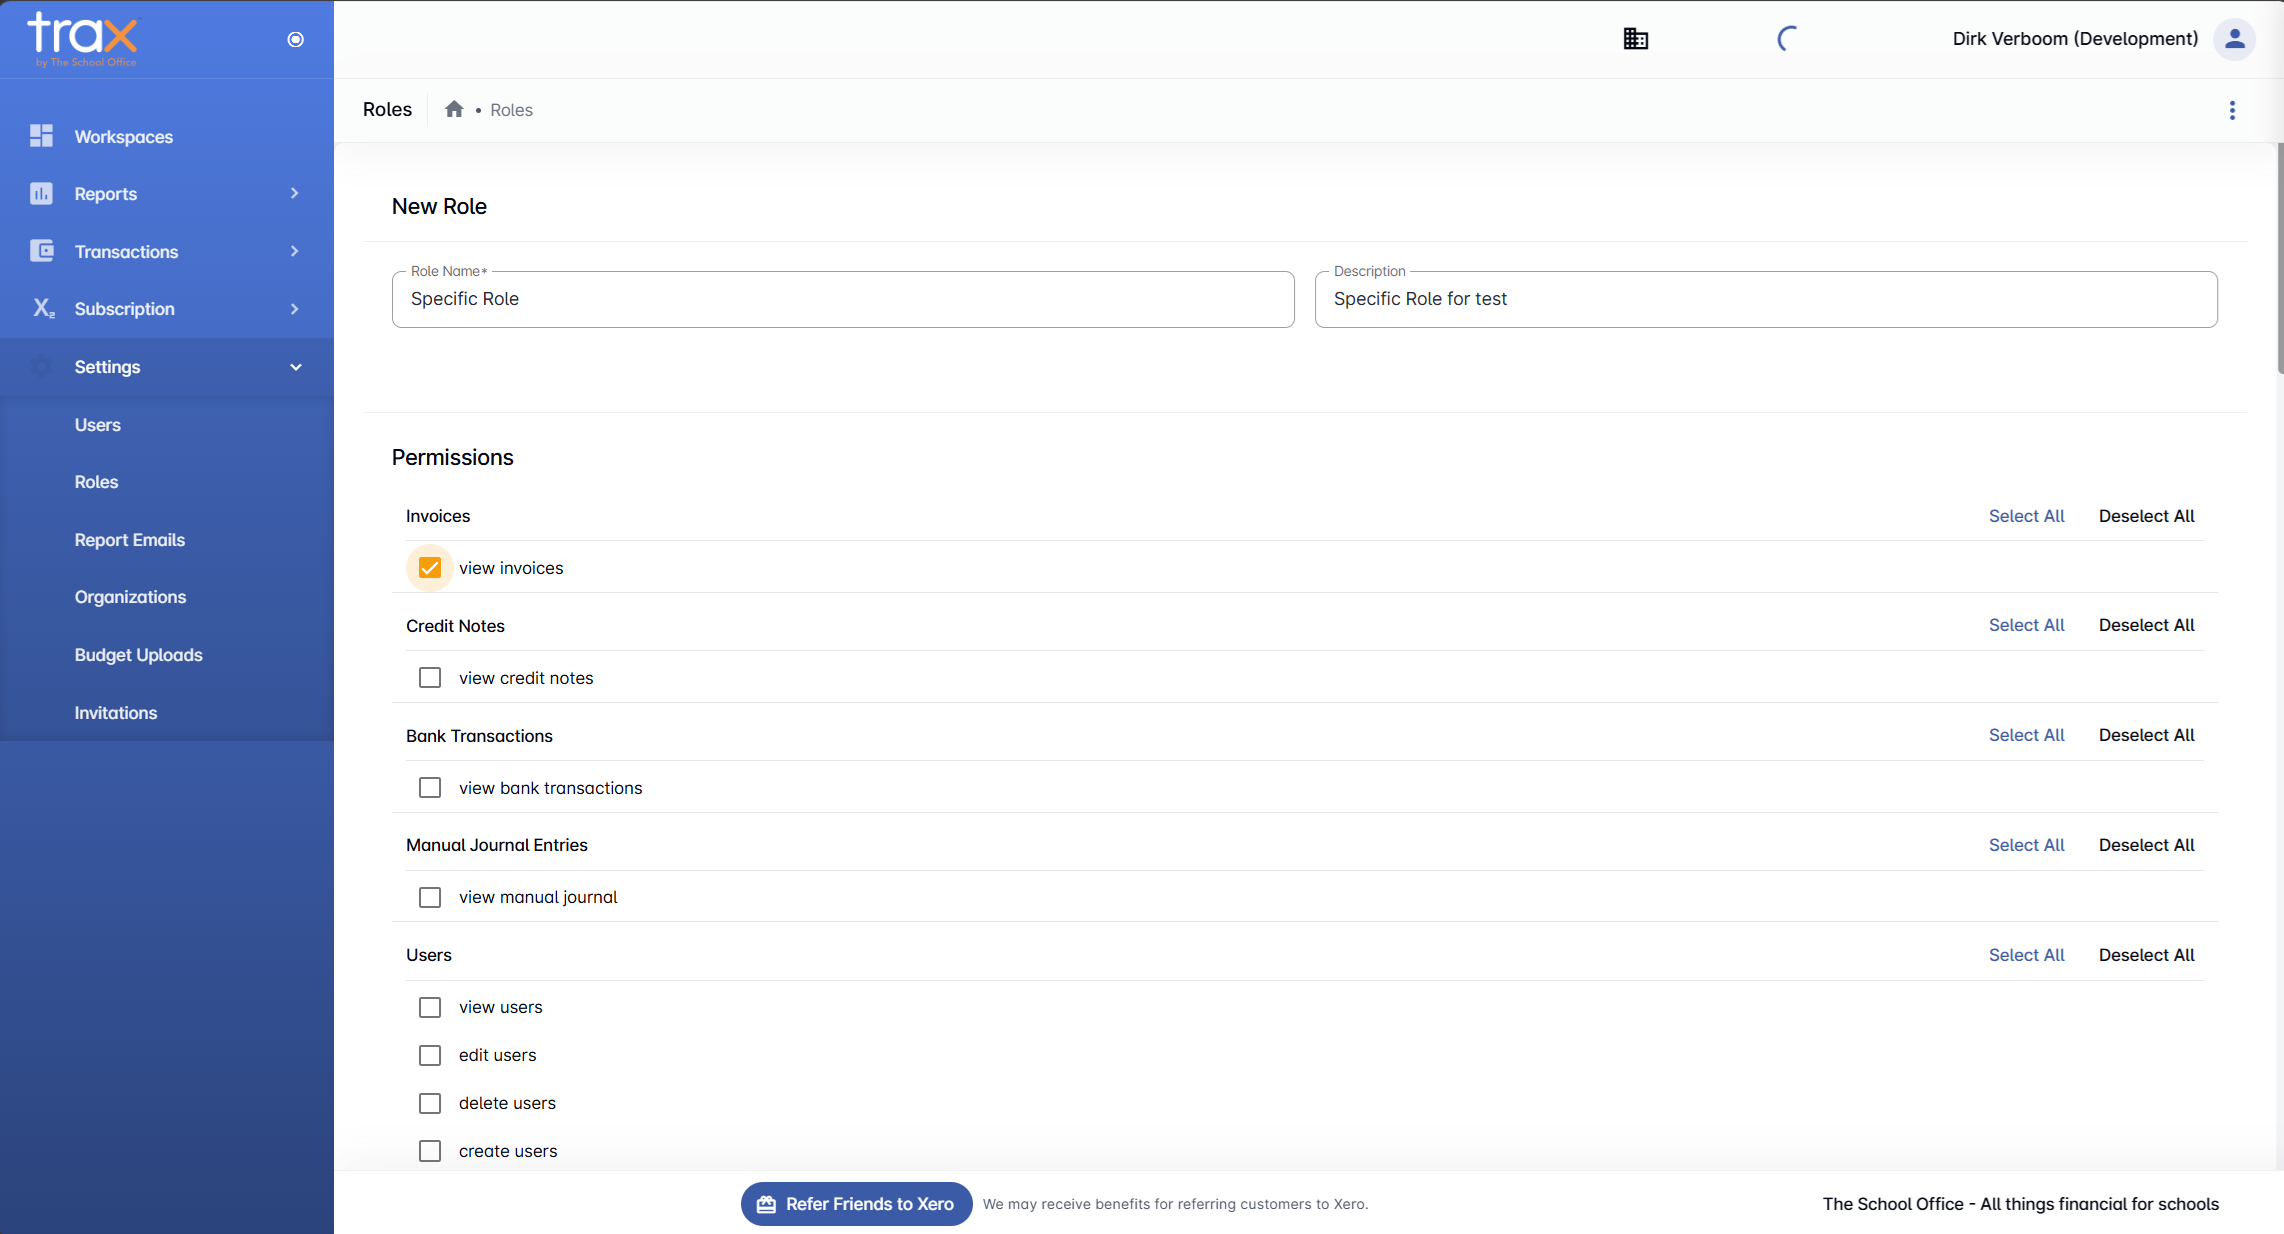
A new role has two basic fields:
- Role Name — what users see in the role picker (e.g. Reports viewer, Bookkeeper).
- Description — a short note for your own reference.
Below that you’ll see the Permissions panel, organised by category. Each category has its own Select All / Deselect All shortcut. The categories cover:
- Invoices — view invoices
- Credit Notes — view credit notes
- Bank Transactions — view bank transactions
- Manual Journal Entries — view manual journal entries
- Users — view, edit, delete, and create users
Scroll further down for subscription and configuration permissions:
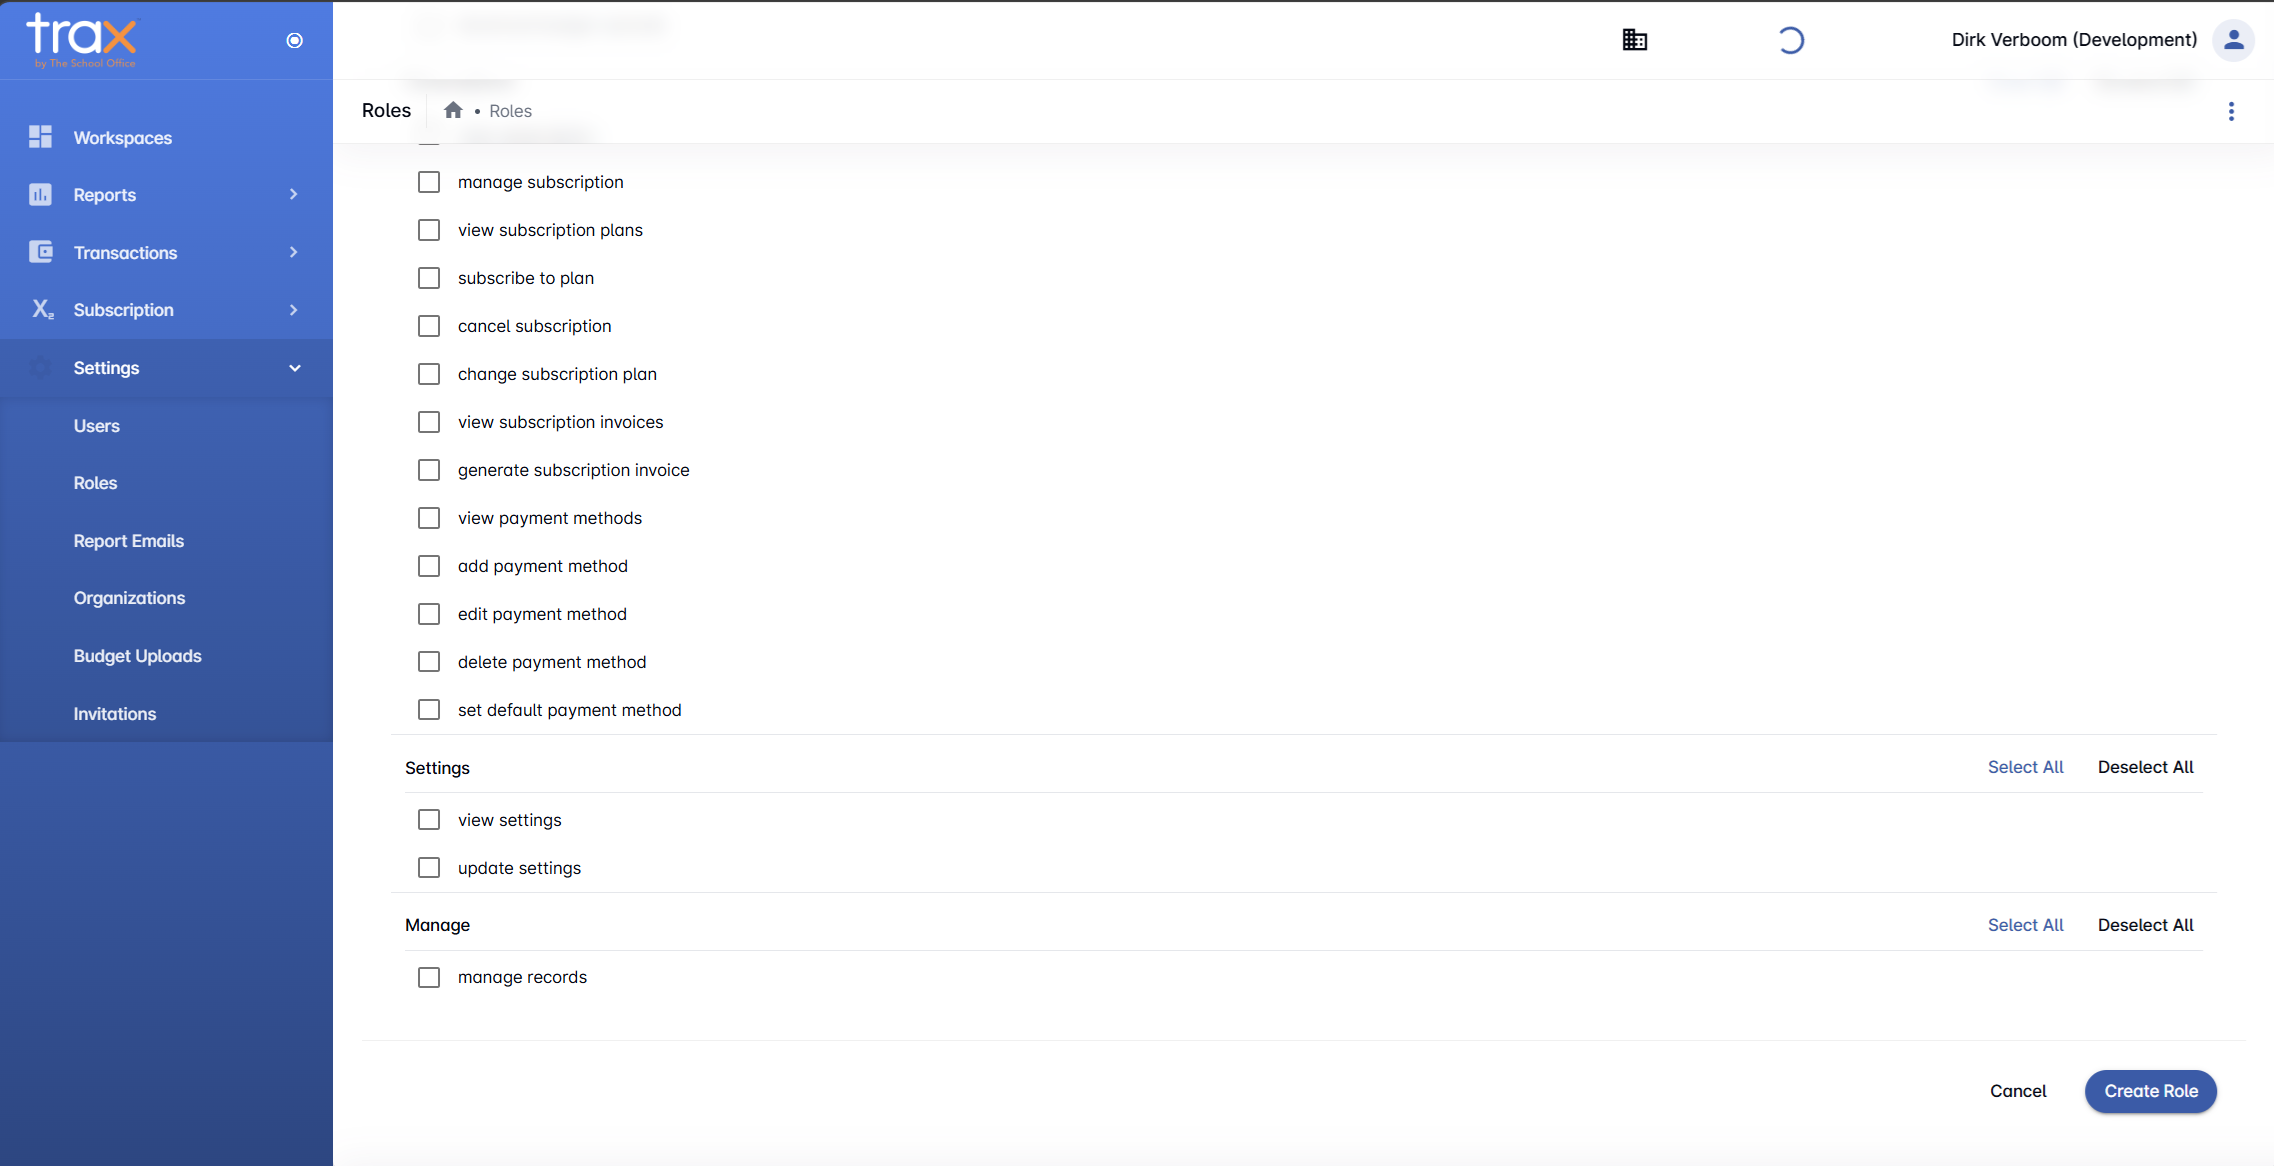
- Subscription — manage subscription, view plans, subscribe to a plan, cancel, change plan, view invoices, generate invoices, and manage payment methods (view / add / edit / delete / set default)
- Settings — view and update workspace settings
- Manage — manage records (a catch-all administrative permission)
Tick the boxes for permissions this role should have, then click Create Role at the bottom right. The new role becomes available immediately in the Tenant role dropdown when sending invitations, and it’ll show up alongside Admin and User.
Tips
- Start with Admin for owners. Anyone who needs full operational control of the workspace should be an Admin.
- Create read-only roles for stakeholders. Heads of departments who only need to view reports don’t need delete or create permissions — set up a role with just the relevant view permissions.
- Review pending invitations. If invites are sitting unaccepted for a long time, resend or revoke them so the list stays tidy.
- Switch without re-login. Use the Workspaces page to jump between workspaces you belong to — there’s no need to log out and back in.
For anything else, get in touch with TSO support.