Roles control what each user can do inside your TRAX workspace. TRAX ships with two built-in roles — Admin (full access) and User (limited access) — and lets you create custom roles for finer control.
To open the Roles page, click Settings → Roles in the left navigation.
The Roles page at a glance

The page lists every role configured in your workspace. Each row shows the role name and has a three-dot menu at the right for editing or deleting it. Use the Search box to find a role by name in larger lists.
Creating a new role
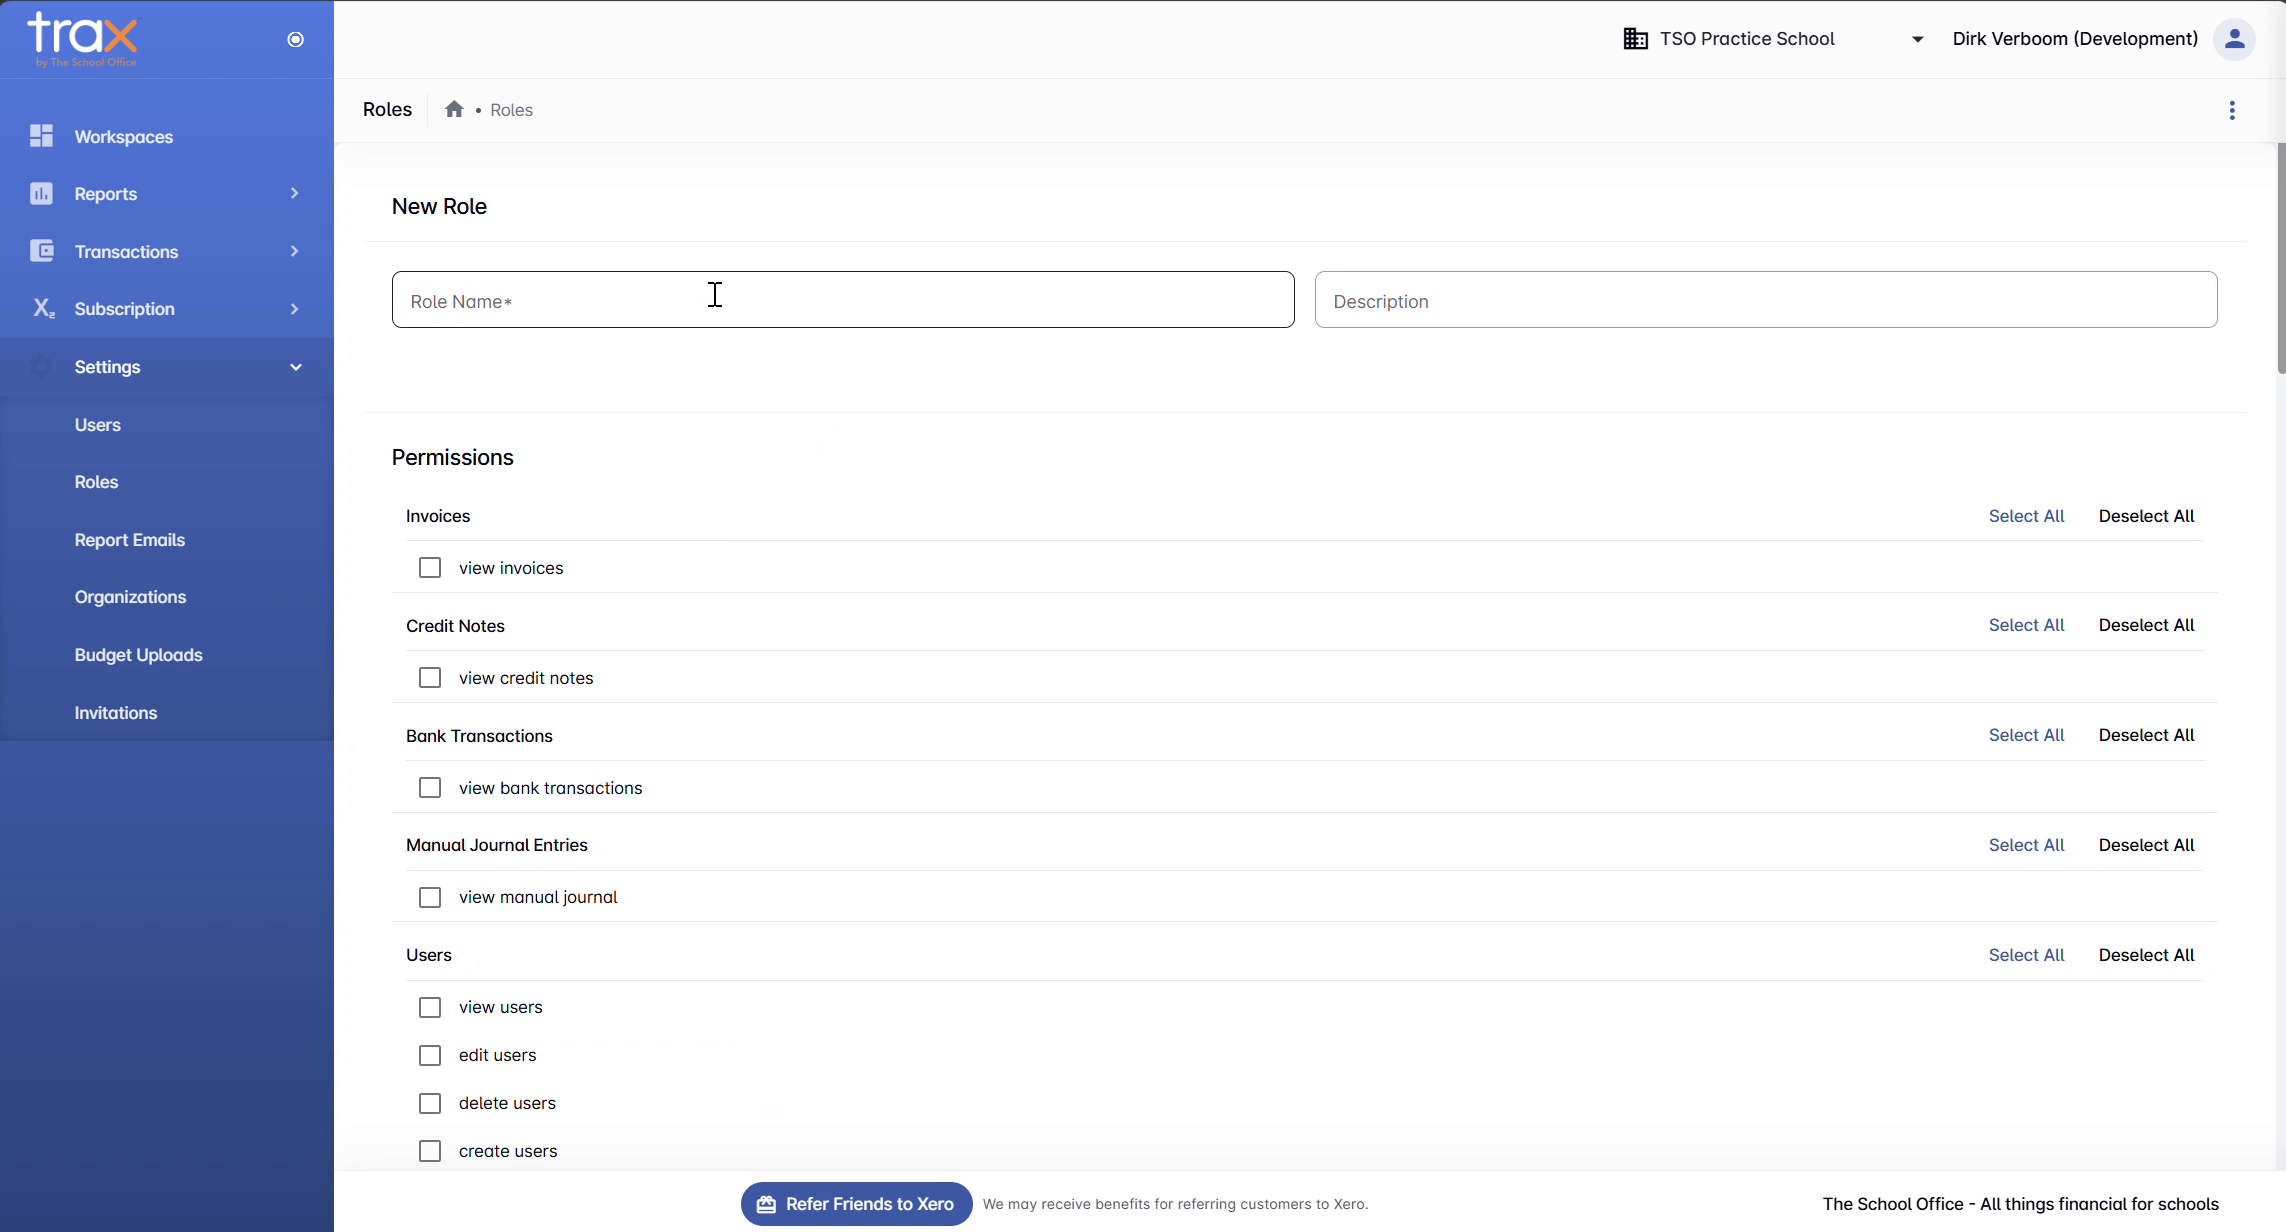
Click + Add New in the top-right to open the New Role page.

A new role has two basic fields:
- Role Name — what users see in the role picker (e.g. Reports viewer, Bookkeeper)
- Description — a short note for your own reference
Below that is the Permissions panel, organised by category. Each category has a Select All / Deselect All shortcut. The categories cover:
- Invoices — view invoices
- Credit Notes — view credit notes
- Bank Transactions — view bank transactions
- Manual Journal Entries — view manual journal entries
- Users — view, edit, delete, and create users
- Subscription — manage subscription, view plans, subscribe to a plan, cancel, change plan, view and generate invoices, and manage payment methods
- Settings — view and update workspace settings
- Manage — manage records (catch-all administrative permission)
Tick the boxes for permissions this role should have, then click Create Role at the bottom right. The new role becomes available immediately when adding users or sending invitations.
Tips
- Start with read-only roles. Heads of departments who only need to view reports don’t need delete or create permissions — set up a role with just the relevant view permissions.
- Reserve Admin for owners. Anyone who manages subscriptions, users, or settings needs Admin. Day-to-day staff usually don’t.
- Use the Description field generously. Future-you will appreciate a clear note about why a role exists.
For anything else, get in touch with TSO support.